Meet Mr Raggedy-Eared Hare

I have been guilty of some skip diving this week! I was invited though. A friend is clearing her house ready to move and I have come away with a bag of t-shirts a stack of picture frames and all sorts of other bits and bobs to recycle into Powertex wonders. She was even throwing out some Christmas decorations so that’s got my head thinking of a ‘Christmas in a day’ class where we will use a range of techniques to create a set of Christmas items to include a wreath, a bauble and a decoration of some sort. Its all whirling around in my head but first….figures!

I have had a LOT of fun over the Easter break working with my daughter on some new Powertex ideas. I have also been trying hard to come up with a way to use Powertex that doesn’t involve getting covered in it. I personally love the feeling of working with my hands covered and daubs on my cheeks but I know its not for everyone. Watch out for an amazing Seahorse class. This project can be created with a brush. I can’t guarantee NO MESS but there will be less.

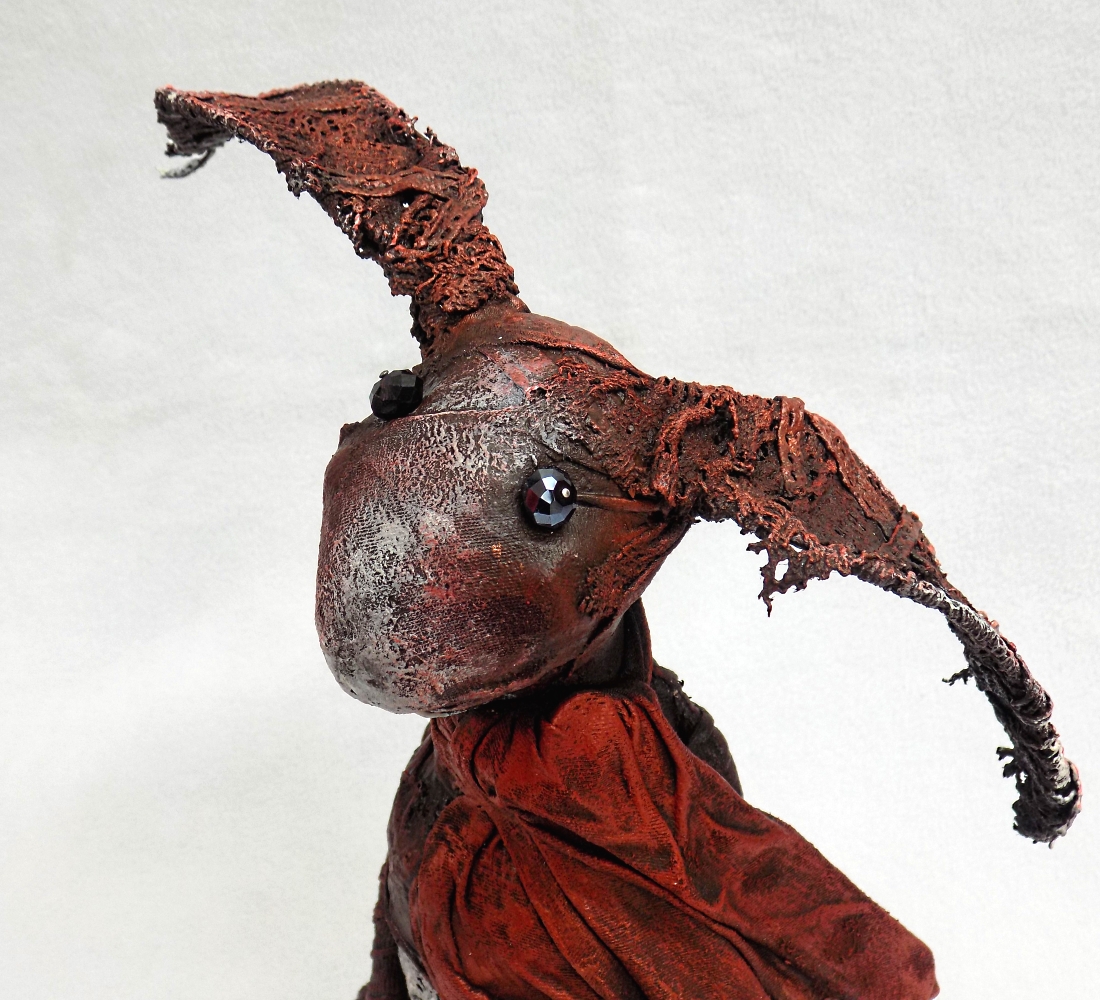
So my daughter and I created the Raggedy Eared Hare which will be coming to a Tudor Rose Classroom in the autumn. Here’s a cheeky peek of his little face!

More about him later though.

In the coming months I have three classes which will teach you how to make beautiful sculptures for you gardens just in time for a few days of the British summer. I have created a seated figure that would look superb amongst your flower beds or kneeling by a tree. I also have a standing figure class which could be a Halloween sculpture too if witches and ghouls are your thing.


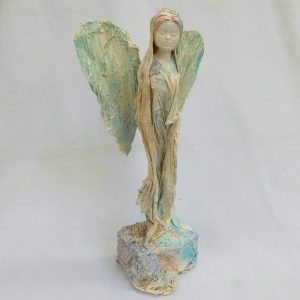
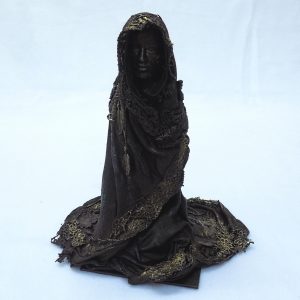
The last of my new classes is the Fantastic Fairy. You may have seen my Bronzed angel in the store last year, well my fairy is a more delicate version of  the angel and is currently sitting on top of our display cabinets guarding the coffee shop.

We will be using ivory Powertex and subtle colours to highlight all of the gorgeous textures in the fabrics that make the figure.

Why not come along and have a calm day making with all of the mess cleared away by yours truly? One of our lovely customers told me her most recent class was the most relaxed she has been in ages which is exactly how I would like you all to feel after a day in the studio. What’s stopping you?

Purple Boots

Pilot’s New Pintor Paint Pens

We’ve recently got a whole range of amazing new pens in the shop, and we’ve had a lot of fun experimenting! Pilot Pintor water based paint pens are so versatile and can be applied to almost any surface they come in two tip sizes: medium and fine, and a wide range of 24 vibrant colours including metallic and pastel shades.

Basics:

  • To prime the tip, shake the pen about 20 times prior to use (with the cap on firmly) and then press the tip of the pen 3-4 times onto paper until the ink flows.
  • These pens are not refillable
  • Store pen with tip facing upwards
  • To avoid getting paint on your iron whilst fixing the designs (for some materials see reverse), use a scrap piece of fabric OR grease proof paper between the iron and your creation.
  • We have found that the Black pen tends to spread more than the other colours. The metallic range of pens does appear to spread the least.

Drawing on different materials:

Porcelain/ Glass & Frosted Glass – for best results apply 2 coats; allow the first coat to dry before applying the second. Once you have completed the design put the item in the oven at 160C for 50 minutes. Best compatibility with metallic colours.

100% Cotton/ Linen– apply 1 coat smoothly, Iron at low temperature without steam to fix the design. The ink will sink in easily and will spread because of the fabrics fibres. However we at Tudor Rose Patchwork have had great success applying this product to cotton and other fabrics. We do advise using a piece of paper behind the fabric to ensure you do not mark any other surfaces.

Polyester/ Satin Fabric– apply 1 coat smoothly. The ink will sink in easily and will spread because of the fabrics fibres. We at Tudor Rose Patchwork have found that on this fabric the ink tends to spread more than with other fabrics. We do advise using a piece of paper behind the fabric to ensure you do not mark any other surfaces.

Glitter Film – These pens can be used in conjunction with the Glitter film range. Apply 1 coat and allow to dry on its own for a few minutes before re-ironing to fix the design.

Popeline/ Delicate Fabric –To avoid blotting trace contours and colour progressively with the tip of the pen. We do advise using a piece of paper behind the fabric to ensure you do not mark any other surfaces.

Leather – Apply 2 coats for best vibrancy and coverage.

Blackboard – The marker will apply easily to blackboards. The marker will not be permanent on a blackboard and can be washed off easily using a wet sponge and lukewarm water. However if the blackboard is damaged or scratched it may be more difficult to remove.

Metal / Plastic – Apply 2 layers, allow the first layer to dry before going over it.

Wood – Sand down the wood beforehand to ensure a smooth surface.

Polystyrene/ Paper / Card – Apply 1-2 layers dependant on desired vibrancy, no fixing required.

Mineral / Stone – Apply 1-2 layers dependant on desired colour vibrancy. If this is for outdoor use apply varnish to finish.


You can find some great tutorials over on the Pilot Pinter website, and don’t forget to check out our range of colours 🙂