FREE Patchwork Slippers Knitting Pattern

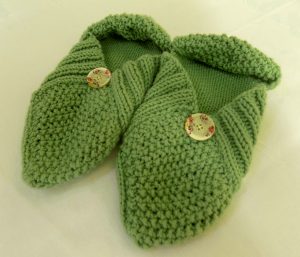
A delightful design – these slippers are easy to make. They fit your feet snuggly and best of all, they are very portable. Just fold them up and take them on holidays.

Materials:

3.75mm needles

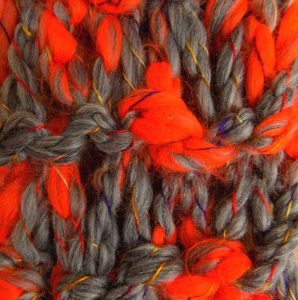
100g of any double knit yarn.

Suggested yarns:

Stylecraft Life DK 100g – 75% acrylic & 25% wool

Stylecraft Wondersoft DK 100g – 100% acrylic

Adriafil Knitcol 50g – 100% merino wool

Adriafil Regina 50g – 100% merino wool, currently with 25% off

Adriafil Magnete 50g – for that felted look with none of the hassle!

Sizing:

The sizing of the slippers is altered depending on how many stitches you cast on and how many rows you work for each square.

Ladies Size 4        Each square should measure 3”. Cast on 16 stitches and work 19 rows

Ladies Size 5        Each square should measure 3 ¼”. Cast on 18 stitches and work 22 rows

Ladies Size 6-7    Each square should measure 3 ½”. Cast on 19 stitches and work 26 rows

 Stocking Stitch Square (make 4)

Cast on according to size.

1st row: knit

2nd row: purl

Repeat until you have completed the correct number of rows for your size.


Rib Stitch Square (make 4)

Cast on according to size.

 1st row: K1, P1 to end of the row

2nd row: P1, K1 to of the row

(Each row starts with the same type of stitch as the last row ends on)

Repeat until you have completed the correct number of rows for your size.

Moss Stitch Square (make 4):

Using the same technique that helps form the rib stitch, you can knit this striking effect. Moss stitch is essentially a 1×1 rib stitch.

Cast on according to size.

1st row: K1, P1 to the end of the row

2nd row: P1, K1 to the end of the row

(Each row starts with the opposite type of stitch as the last row ends on)

Repeat until you have completed the correct number of rows for your size.

 Making up:

 Step one:

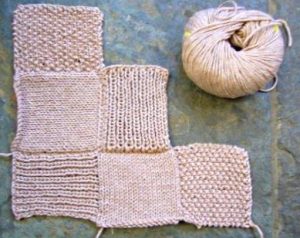
Take 2 of each square to form each slipper, and sew together as in the photo. Two stocking stitch squares form part of the slipper base. Two ribbed squares form the base and sides. Two moss stitch squares form the heel and front of your slippers.

Make sure that you sew in the ribbed squares exactly as the picture shows so that the cast off edges form part of the opening of the slipper.

 Step two: 

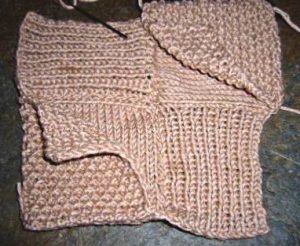
Take the two moss stitch squares and sew to the edges of the stocking stitch squares as shown. You have now formed the heel and the toe. Now take one of the moss stitch squares only. This will form the front of your slipper. Sew up a third edge to the side edge of the ribbed square. Now sew up the fourth edge to the edge of the other ribbed square.

Finishing – To edge your slipper, crochet a chain around the opening of the slipper, or make an i-cord and sew around the opening.

I-Cord:

Step 1: Cast on a few stitches. I-Cord is usually made using 3-5 stitches.

Step 2: Knit one row

Step 3: Do not turn the work, just slip your work to the other end of your double

pointed needle. Your working yarn will be at the “wrong” end of your     work.

Step 4: Pull the working yarn tightly along the back of your work and knit the

next row.

Step 5: Repeat steps 3 and 4 until you have an I-Cord that will fit around the slipper opening with a slight stretch. Sew in place.

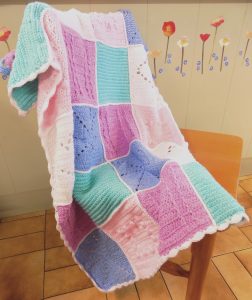
Decorate with buttons as we have done or embroidery, beads, ribbon. There are endless possibilities.

FREE Loopy Scarf Pattern

This unusual looking scarf takes approximately one hour to make. Perfect for whipping up an evening, or in a long queue!

Requirements:

One set of 15mm straight needles

50g Adriafil EtaBeta,  or Stylecraft Swift Knit.

Loop st: Insert needle into stitch knitwise, wrap yarn around needle twice. Pull yarn through, and leave both loops on right needle. Slide stitch off left needle.

Instructions:

Using 15mm knitting needles, cast on 5 sts.

Row 1: Loop st across all 5 sts.

Row 2: K all sts, treating each loop wrap as 1 stitch.

Repeat rows 1 and 2 until the scarf is the length

required, or you have 30 cm of yarn remaining.

Cast off loosely.

Making up: Wrap scarf around neck, and pull

through a central loop near end of scarf to secure.

We’ve knotted the ends of our scarf just to give it a little extra weight at the ends!

This pattern can be adapted to any yarn.  Our

recommendation is to use needles larger

than the yarn indicates and that the yarn should

have some variation in it.  The number of stitches

can also be altered till you get the width you need, although wider scarves will use more yarn!

Project Linus Update

We’ve received a wonderful message from Elaine, who distributes our Project Linus quilts. She’s had some thank-you emails, along with some lovely photos of happy recipients!

” ‘Since you came into St Johns and dropped off the blankets there has been a real special buzz on how well they are supporting the children in such a large variety of ways.

We separated the blankets into Seniors and Primary and each blanket has found a home with individual students for them to use during their school day. The blanket belongs to the student and will travel up with them through out their school life(which is perfect for this time of year when the students are going through such changes) and if the blanket last long enough will go with them into adulthood.

I’m so pleased I responded your email as the benefits seen in the students from having one of the beautiful hand-made blankets is so warming.

Please pass on my thanks to all the amazing members of the project who produce these beautiful items.

Thank you and take care
Faye’

A second thank you came from Bedford Hospital

‘I just wanted to say a huge thank you for the beautiful hand made quilts we have received on Riverbank Ward to use with the children here.Each one is a work of art and will be carefully placed with a child who I am sure will cherish it forever. It is such a lovely idea, thanks to you and your team for spending the time creating and making these beautiful items.
I’ve only just seen them today but felt compelled to email you immediately!
Anne’

And a third one from a Women’s refuge that Kathy specifically wanted to 
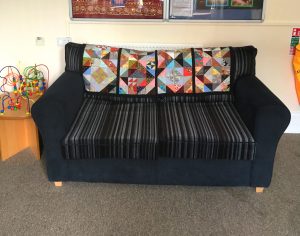
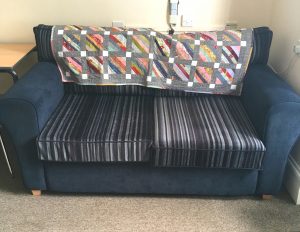
give some quilts to, after Ruth’s visit to our last meeting at Tudor Rose. the quilts had been sitting on the top of her wardrobe (as you do) and they have now found a new home

‘I just thought you may like to see two of the larger quilts in situ. They go beautifully with the colour scheme in our residents lounge. If you can pass on special thanks to Kathy too please. I haven’t managed to get our handyman to put up the ones for the wall yet, but I will send you a picture when I do.

Ruth’

So thank you all so much, it’s a pleasure to be able to spend time together at the Tudor Rose making the quilts and then deliver them around Bedfordshire and to see how grateful everyone is when I show them what I have brought them and they obviously get pleasure in passing them on to the children.
Enjoy the summer and see you all in September.

Regards,
Elaine”

Project Linus is a fantastic charity who distribute comfort blankets to disadvantaged and sick children and teens. You can find out more about their valuable work HERE

Want to contribute? Find out all about our upcoming Project Linus days HERE

Pixie Dust Crochet Along Blanket

PIXIE DUST (NOUN)

A substance or influence with an apparently magical effect that brings great success or luck.

Origin: 1950’s. From the magic dust that enabled humans to fly in J. M. Barrie’s Peter Pan

We’re so excited to be announcing our very first Crochet Along! We will be officially launching for The Festival Of Quilts at Birmingham NEC from 10th – 13th August (we’re on Stand E3), but you can sign-up online now ready to receive your first installment on 15th August. When you buy the bundle at the special price of £20.00 you will receive a free pattern every following 2 weeks for 10 weeks. The end result is an adorable baby blanket or throw, use it in the pram, pushchair or car seat.

The blanket is made in the beautiful, soft Peter Pan Pixie yarn. The patterns are aimed at beginners and build each week on the skills you learnt the week before. However, this is a simple pleasure for the more experienced crocheter.

The pattern is utterly flexible, you could change the colours, increase the size, change the yarn. Make it for a friend, a child, a teenager, an elderly aunt…

You will need a 3.5mm crochet hook, scissors and a knitter’s needle, and the size of the finished throw is approximately 91.5 x 68.5 cm (36 x 27″).

Sign up and join in here: Pixie Dust CAL