
Sewell & Savill Experience
 What an amazing day! Jon, Beccs and I joined two other ladies in a class with Laura from Sewell & Savill using embroidery machines. We sell embroidery machines here at Tudor Rose Patchwork and although we knew the basics, we really didn’t know how wide a range of techniques there are and how many different things can be made so simply.
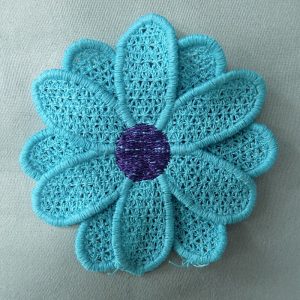
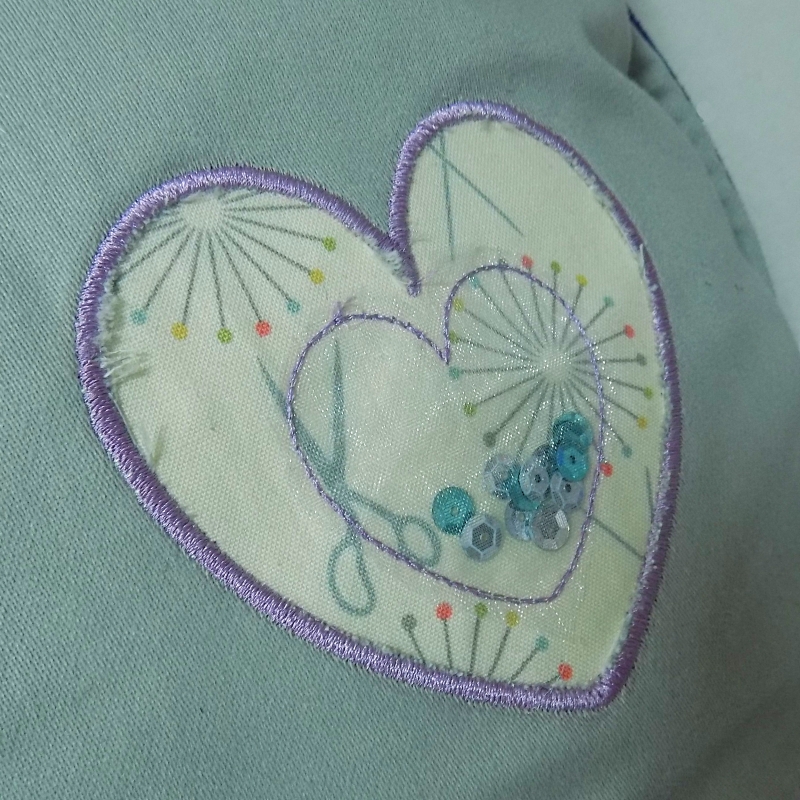
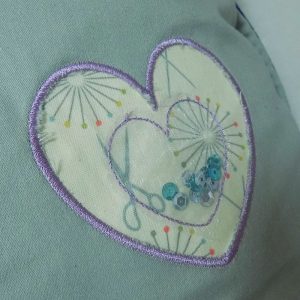
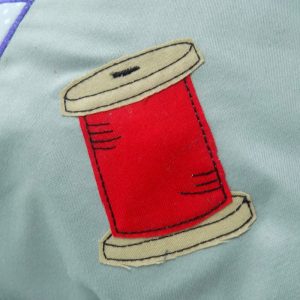
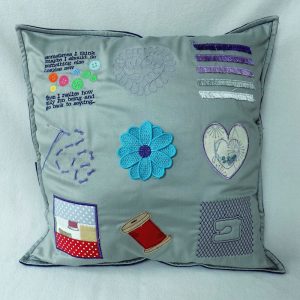
I’ve been blown away by how much an embroidery machine can do. We looked at 10 different projects. We made a fancy button hole, complex designs using metallic threads, we discovered the tricks of the trade for lettering. We used embroidery designs to quilt, we learnt how to make a log cabin pattern. We made lace flowers and attached them to our sampler cushion. We explored applique and created a pretty reverse applique adding sequin embellishments. We made chenille trim and a decorative pattern using eyelets.
The whole day was a lovely experience. Not just because we were learning from a highly experienced tutor. The day was run in easy sessions broken up with tea and biscuits, a nice lunch – although we did find it hard to tear ourselves away from the machines. And just when we were starting to flag, we were treated to tea and cake.
Not only do you get everything during the day, but Laura sends all the tips and tricks to you by email so you have them to refer back to at your leisure.
If you have any questions at all, whether it be about buying an embroidery machine or attending a class with Laura to learn how to do more with a machine you already own, please get in touch. You can visit us in store, give us a call on 01234 824983 or email us on info@tudorrosepatchwork.co.uk
Click here to see more about Laura’s classes.
Pilot’s New Pintor Paint Pens
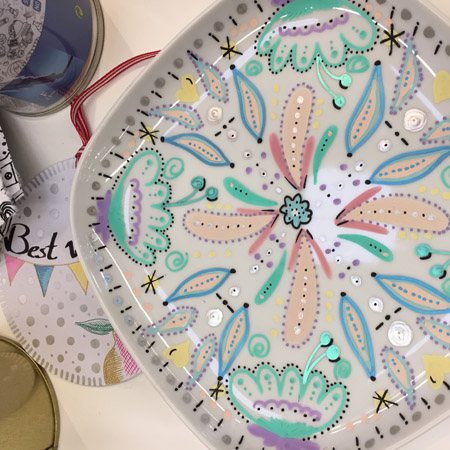
We’ve recently got a whole range of amazing new pens in the shop, and we’ve had a lot of fun experimenting! Pilot Pintor water based paint pens are so versatile and can be applied to almost any surface they come in two tip sizes: medium and fine, and a wide range of 24 vibrant colours including metallic and pastel shades.
Basics:
- To prime the tip, shake the pen about 20 times prior to use (with the cap on firmly) and then press the tip of the pen 3-4 times onto paper until the ink flows.
- These pens are not refillable
- Store pen with tip facing upwards
- To avoid getting paint on your iron whilst fixing the designs (for some materials see reverse), use a scrap piece of fabric OR grease proof paper between the iron and your creation.
- We have found that the Black pen tends to spread more than the other colours. The metallic range of pens does appear to spread the least.
Drawing on different materials:
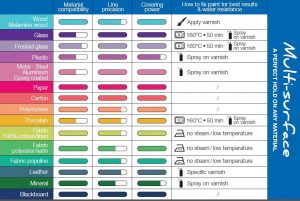
Porcelain/ Glass & Frosted Glass – for best results apply 2 coats; allow the first coat to dry before applying the second. Once you have completed the design put the item in the oven at 160C for 50 minutes. Best compatibility with metallic colours.
100% Cotton/ Linen– apply 1 coat smoothly, Iron at low temperature without steam to fix the design. The ink will sink in easily and will spread because of the fabrics fibres. However we at Tudor Rose Patchwork have had great success applying this product to cotton and other fabrics. We do advise using a piece of paper behind the fabric to ensure you do not mark any other surfaces.
Polyester/ Satin Fabric– apply 1 coat smoothly. The ink will sink in easily and will spread because of the fabrics fibres. We at Tudor Rose Patchwork have found that on this fabric the ink tends to spread more than with other fabrics. We do advise using a piece of paper behind the fabric to ensure you do not mark any other surfaces.
Glitter Film – These pens can be used in conjunction with the Glitter film range. Apply 1 coat and allow to dry on its own for a few minutes before re-ironing to fix the design.
Popeline/ Delicate Fabric –To avoid blotting trace contours and colour progressively with the tip of the pen. We do advise using a piece of paper behind the fabric to ensure you do not mark any other surfaces.
Leather – Apply 2 coats for best vibrancy and coverage.
Blackboard – The marker will apply easily to blackboards. The marker will not be permanent on a blackboard and can be washed off easily using a wet sponge and lukewarm water. However if the blackboard is damaged or scratched it may be more difficult to remove.
Metal / Plastic – Apply 2 layers, allow the first layer to dry before going over it.
Wood – Sand down the wood beforehand to ensure a smooth surface.
Polystyrene/ Paper / Card – Apply 1-2 layers dependant on desired vibrancy, no fixing required.
Mineral / Stone – Apply 1-2 layers dependant on desired colour vibrancy. If this is for outdoor use apply varnish to finish.
You can find some great tutorials over on the Pilot Pinter website, and don’t forget to check out our range of colours 🙂